Quick Start Guide
Hardware can fail. To provide a reliable service, you need a solution, that detects failure and acts automatically. OZEKI Cluster automatically moves any service to another computer in case of a hardware failure, and keeps the IP address associated with the service on-line. Ozeki Cluster can also keep your files synchronized. Learn how to setup such a solution.
Prerequisites
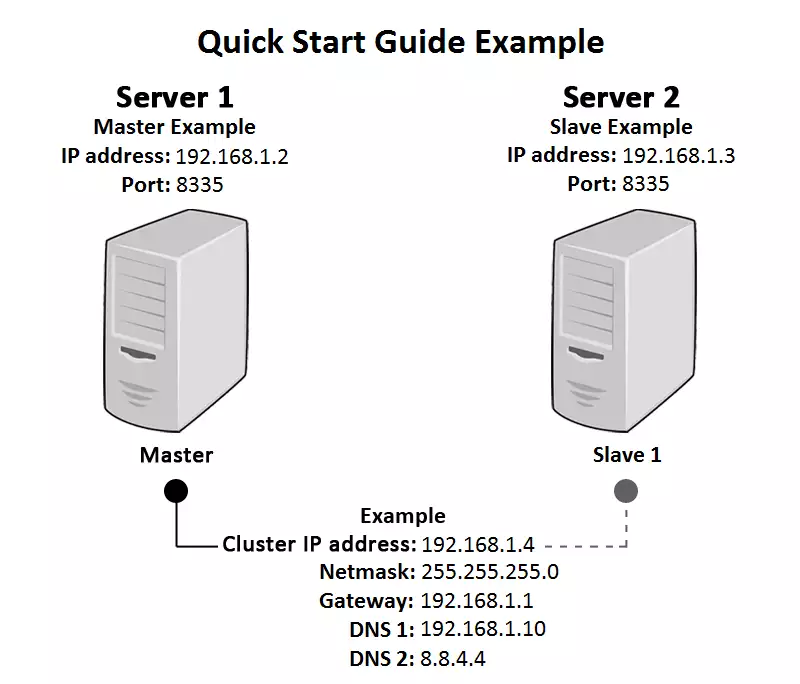
At least 2 nodes are needed for creating a system where the role of the Master node can be transferred to another node.
Each node must comply with the following requirements:
- Supported Operating Systems:
- Windows 11
- Windows 10
- Windows Server 2022
- Windows Server 2019
- Windows Server 2016
- Windows Server 2012
- Microsoft .NET Framework 4.0 or any newer version
- 32 or 64 bit CPU with 1 GHz speed or more
- 350 MB free HDD space
- 1 GB RAM or more
The selected services have to be installed on every node in case you would like to use them in the same cluster. On each node the program of Ozeki Cluster must be installed.
Download link and installation guide
Logging in
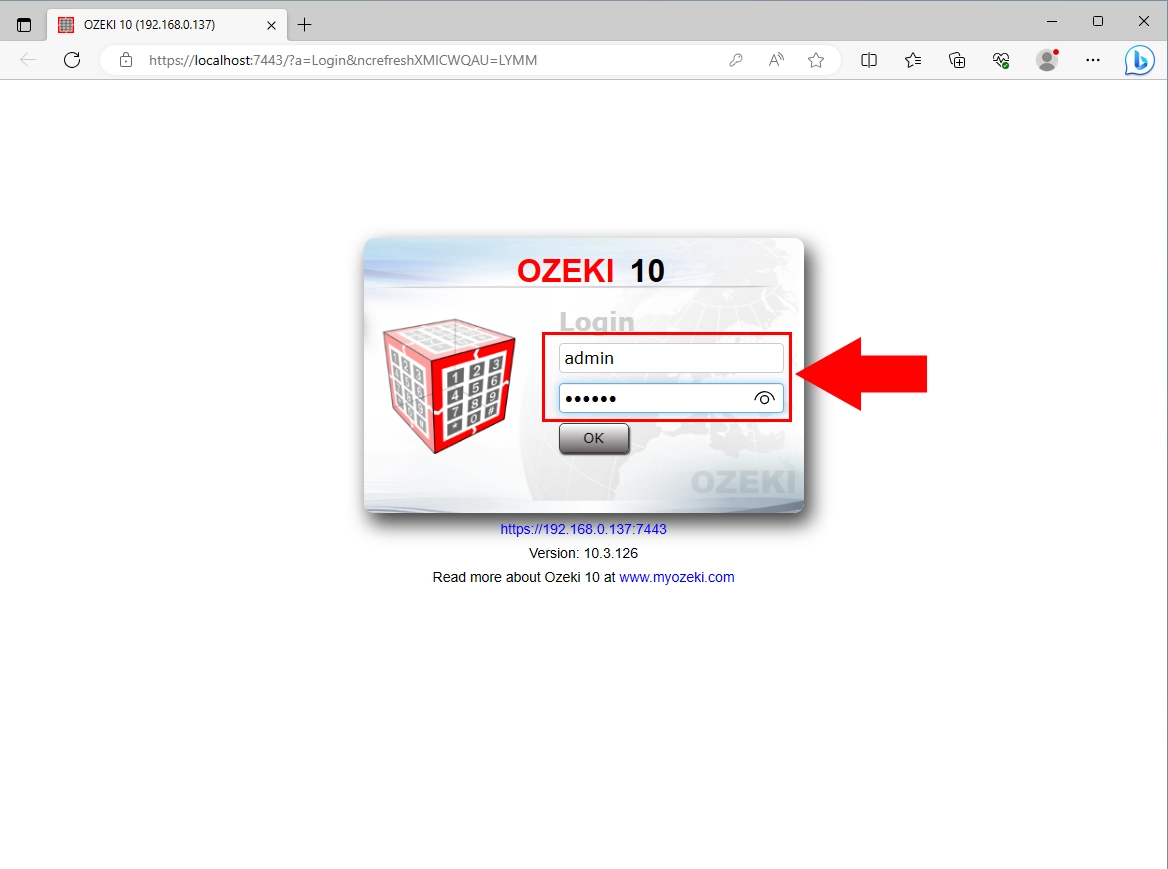
After you have downloaded and installed Ozeki Cluster, the first thing you will do is to log in to the user interface (in other words, the management console). You can open it directly after the 'Installation Completed' dialog box appears. Logging in is also possible if you open the login window, and then click on the Ozeki Cluster icon on the Desktop as shown in Figure 2 . If OZEKI Cluster is running in the background, you can log in using a browser by opening the login window (http://127.0.0.1:8333 URL). The login window can be seen in Figure 3.

In the login page (Figure 3) enter your username and password in the required fields. The username and the password are the same that you gave during installation. For security reasons, your password should be at least 6 characters long, and it should be a combination of letters and digits.
Basic Configuration Steps
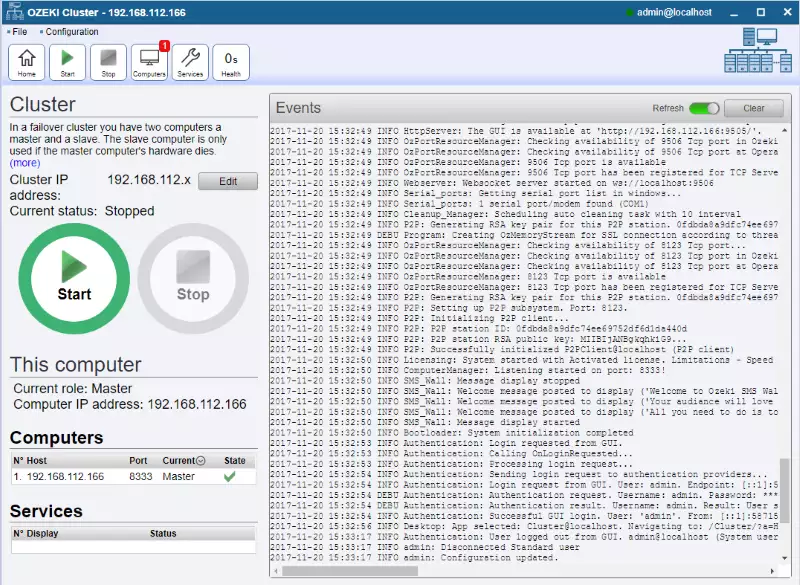
After you are logged in, you will see the 'Home page' (Figure 4).
Step 1 - Setup the Cluster IP address
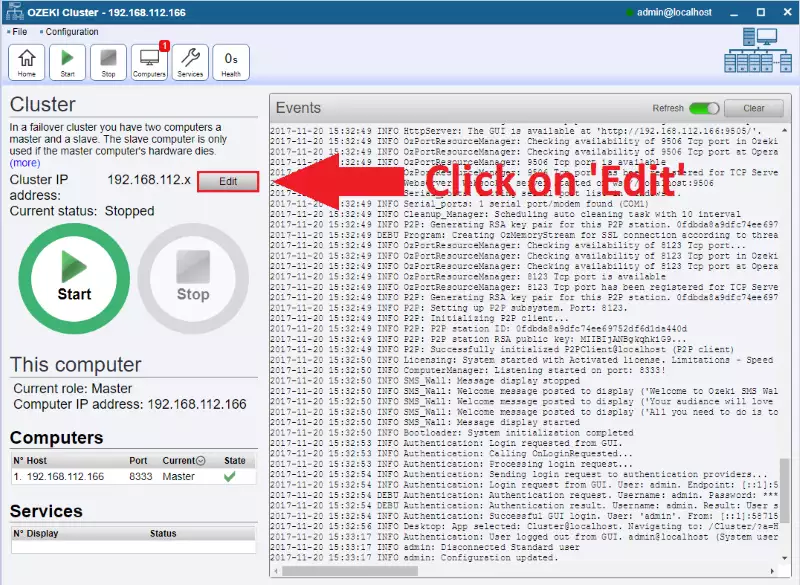
On the home page, click on 'Edit' (Figure 5).
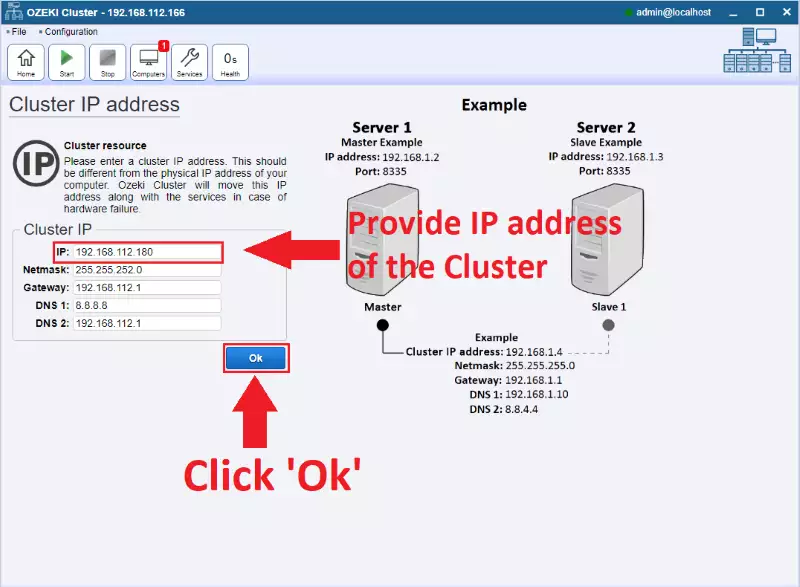
In the Cluster IP address menu (Figure 6), you need to add the cluster's IP address. It must differ from any used IP address on the network. The netmask, gateway, and DNS fields are filled in automatically. If you are finished, click 'Ok'.
Now it's time to set up the Slave node(s) on the cluster. As a remark, the Master node is already configured automatically.
Step 2 - Navigate to the 'Computers' page
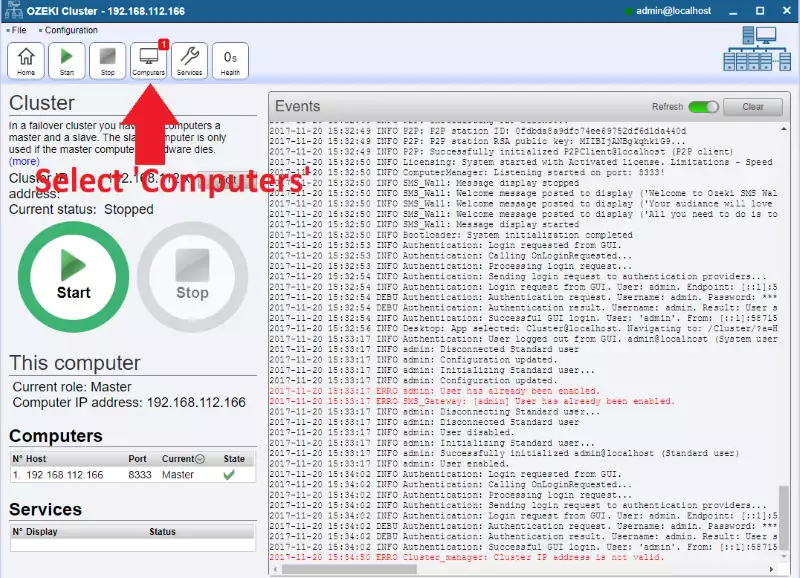
On the home page, select 'Computers' on the right hand side panel (Figure 7).
Step 3 - Configure the Slave node(s)
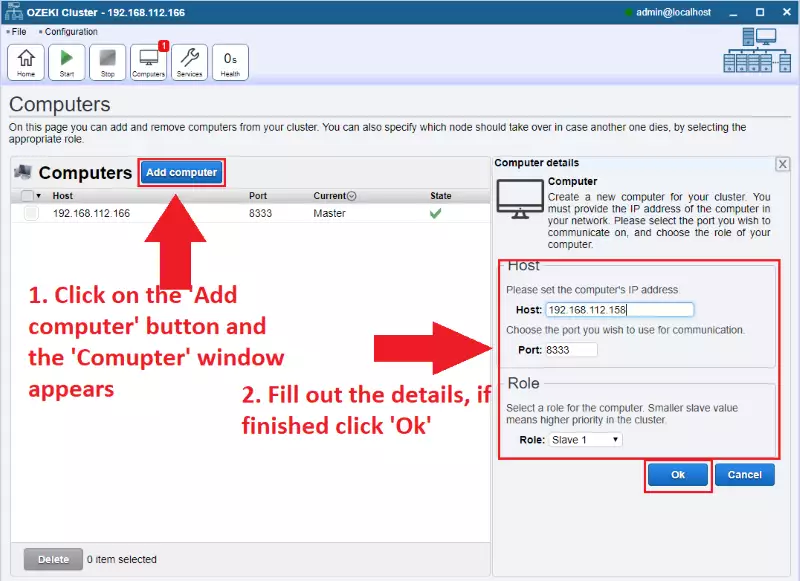
Click on the 'Add computer' button and the 'Computer details' window will turn up next to the 'Computers' list.
In this window, you need to add the details of the Slave node:
Host - The Slave computer's IP address.
Port - OZEKI Cluster's port number on the Slave computer
Role - In this case, the role is set to 'Slave'.
Finally click the 'Ok' button to save the configuration. (Figure 8)
If you would like to add more slave nodes, just repeat Step 3.
You can change the Master node configuration as well, if needed.
Let's add some services to our cluster!
Step 4 - Navigate to the 'Services' page
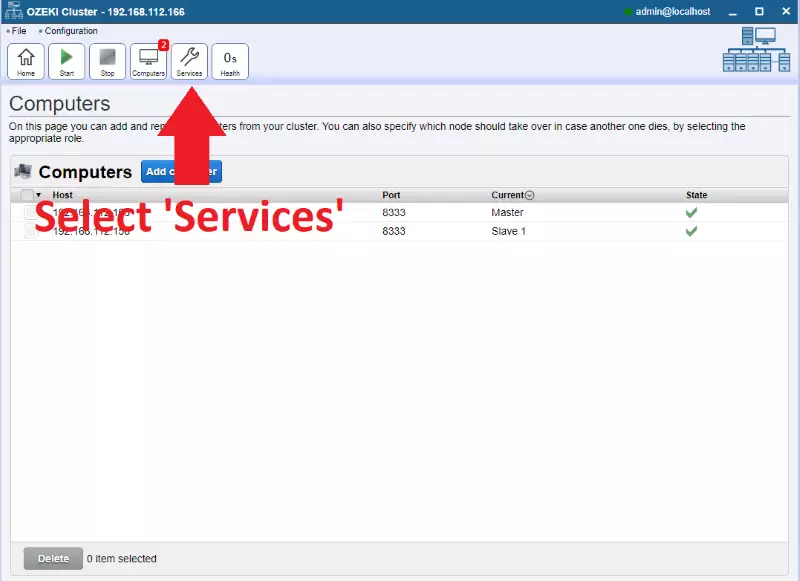
Select 'Services' from the right panel to add one or more services. (Figure 9)
Step 5 - Add the services
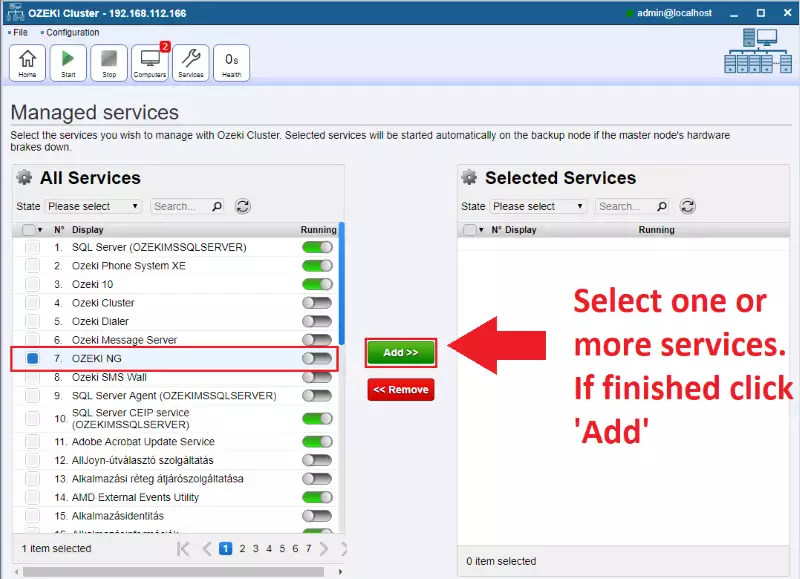
In our example, we will show you how to add OZEKI NG SMS Gateway to the cluster. You can also choose any service you have on the Master node, and as many services as you want. You must have the added services installed on the Slave nodes as well.
On the left hand side list, select OZEKI NG. Then click the 'Add' button in the middle of the screen (Figure 10).
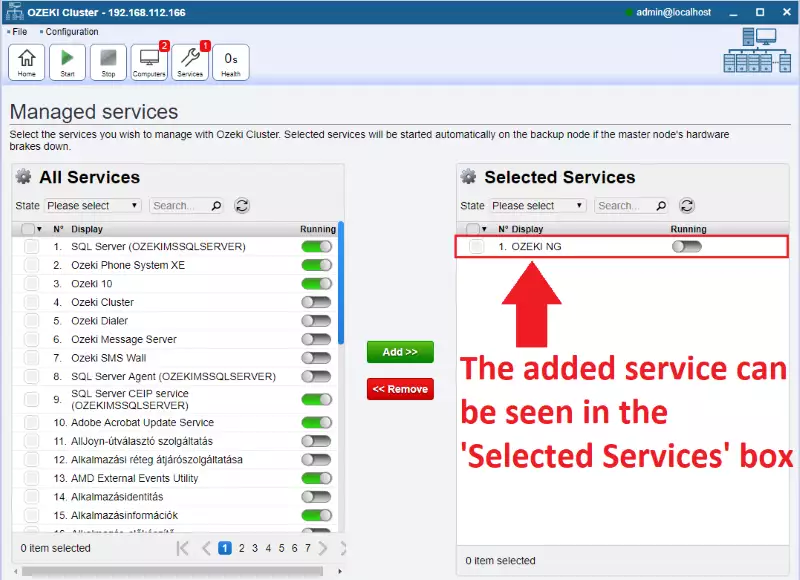
The service should now appear in the 'Selected Services' list. (Figure 11)
If you would like to add more services, just repeat Step 5.
Step 6 - Set the boot delay (Optional)
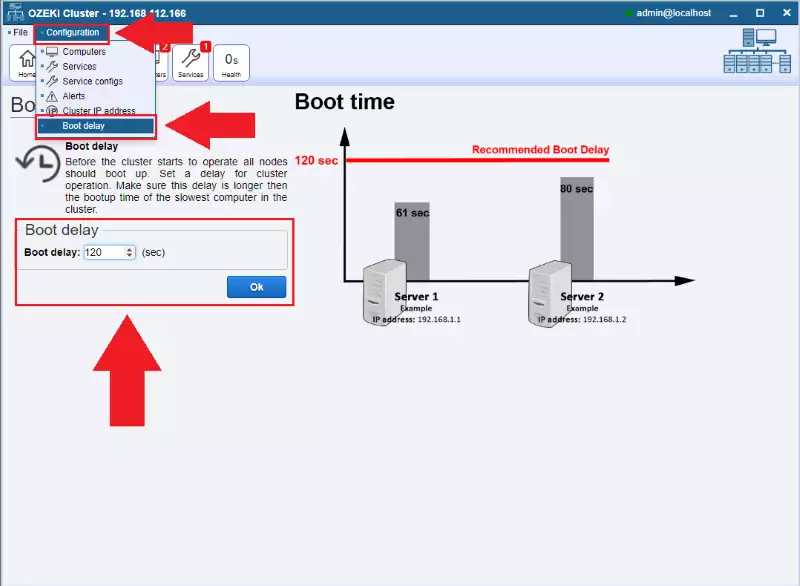
You can set the boot delay according to the boot time of the slowest booting node. Therefore if the slowest node is not turned on by the time Cluster has already started running then it will result in unavailability of that node. We have already set up a default boot delay time which is 120 sec. You can set this function easily by clicking on the 'Configuration' menu and choose 'Boot delay' submenu. You will also see a diagram on this page which represents you the situation. (Figure 12).
Step 7 - Synchronize the configuration settings of the nodes (Optional)
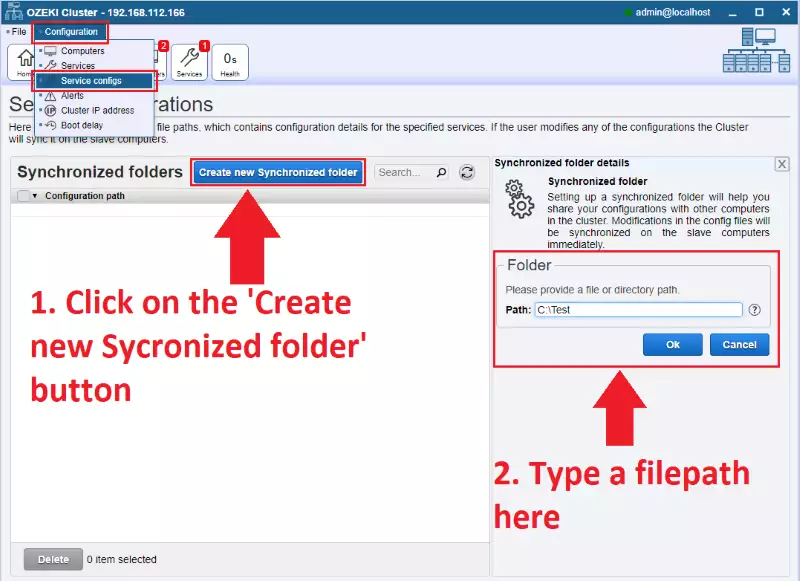
If you click on the 'Configuration' menu you will find 'Service configs' submenu where you can setup this solution.
Then click the 'Add' button and a window will appear in which you can give the access path of the directory including the settings of the service you would like to synchronize. (Figure 13)
Step 8 - Start the cluster
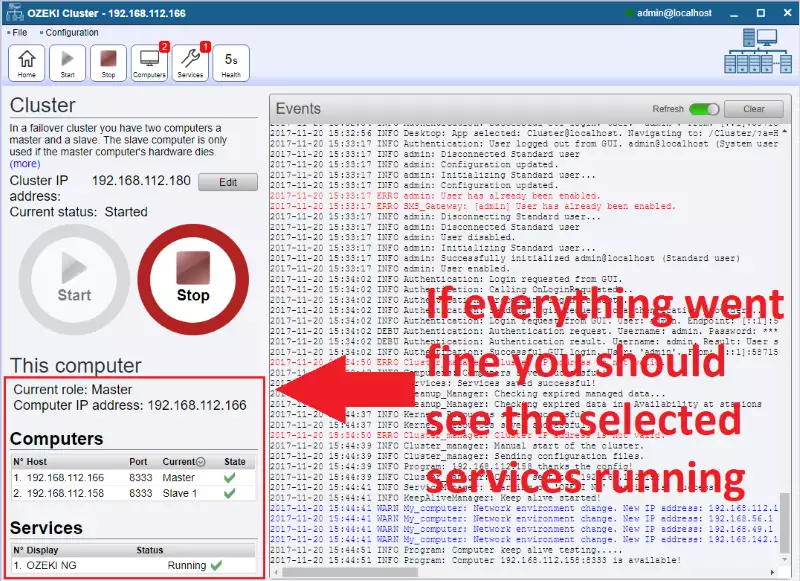
If you have followed this guide thoroughly, you will see a similar result as shown in the pictures below.
Finally, click on the 'Start' button to start the cluster (Figure 14).
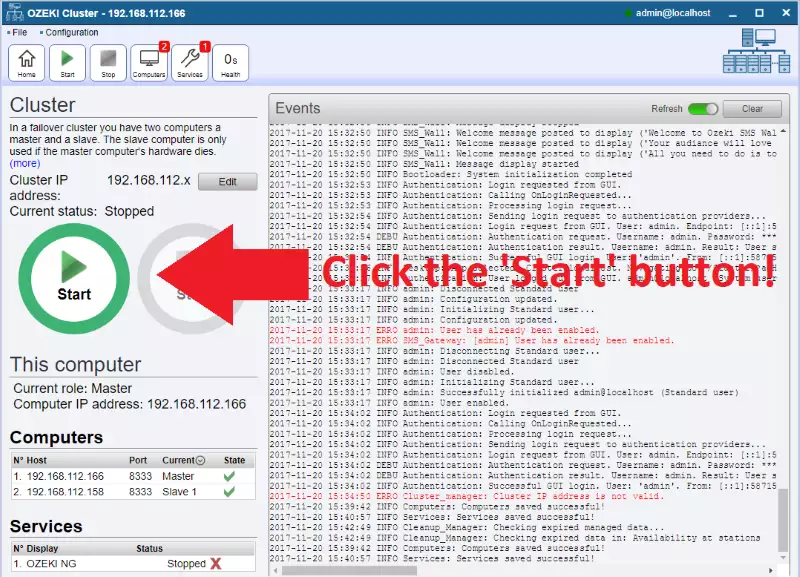
If everything went fine, you should see all of the selected services running (Figure 15).
